DecaHub
Setting up DecaMove should be simple and straightforward. Don’t forget to visit the setup section on the DecaGear website in order to download and install 'DecaHub' - the DecaMove PC software, or Android app (IOS version to coming soon). It supports most of the VR titles in the Steam library, right out of the box.
Supported VR Headsets: DecaMove currently supports SteamVR games on the following headsets:
- Oculus Rift S, Oculus Quest and Quest 2 using Oculus link.
- WMR: HP Reverb G2 and Samsung Odyssey
- Valve Index
- Pimax
Prerequisites
- Windows 10
- Compatible VR headset
- SteamVR: Version 1.14 or greater
- A single USB 2.0 or 3.0 port
- DecaMove device
- DecaHub.exe
![Setup the DecaMove Setup the DecaMove]()
Setup Steps
1. Connecting
- Download and install the DecaHub on your desktop
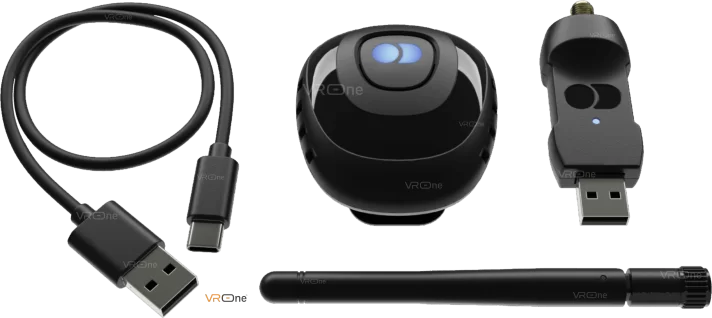
- Screw in the extended range antenna onto the USB dongle
- Connect the USB dongle to your PC, preferably a port on the front of your PC. If you don’t have an available port on the front of your PC, please ensure you use an upper USB port on the rear. (dongle can be connected to a USB 2.0 or 3.0 port)
- You should see the DecaHub software connection status change from “Closed” to “Open”
2. Pairing DecaMove
- Ensure the DecaMove device is fully charged - the device does come partly charged
- Switch on the DecaMove by pressing the button for 2 seconds. The pairing should be automatic once the USB dongle is connected to a USB port and the LED light on the DecaMove device should show solid blue colour, indicating that the device is paired and will show a connection status from "Open" to "streaming"
3. Calibrate the Magnetometer
(required for first time use only)
The DecaMove magnetometer should be calibrated - The whole process only takes about 20 seconds.
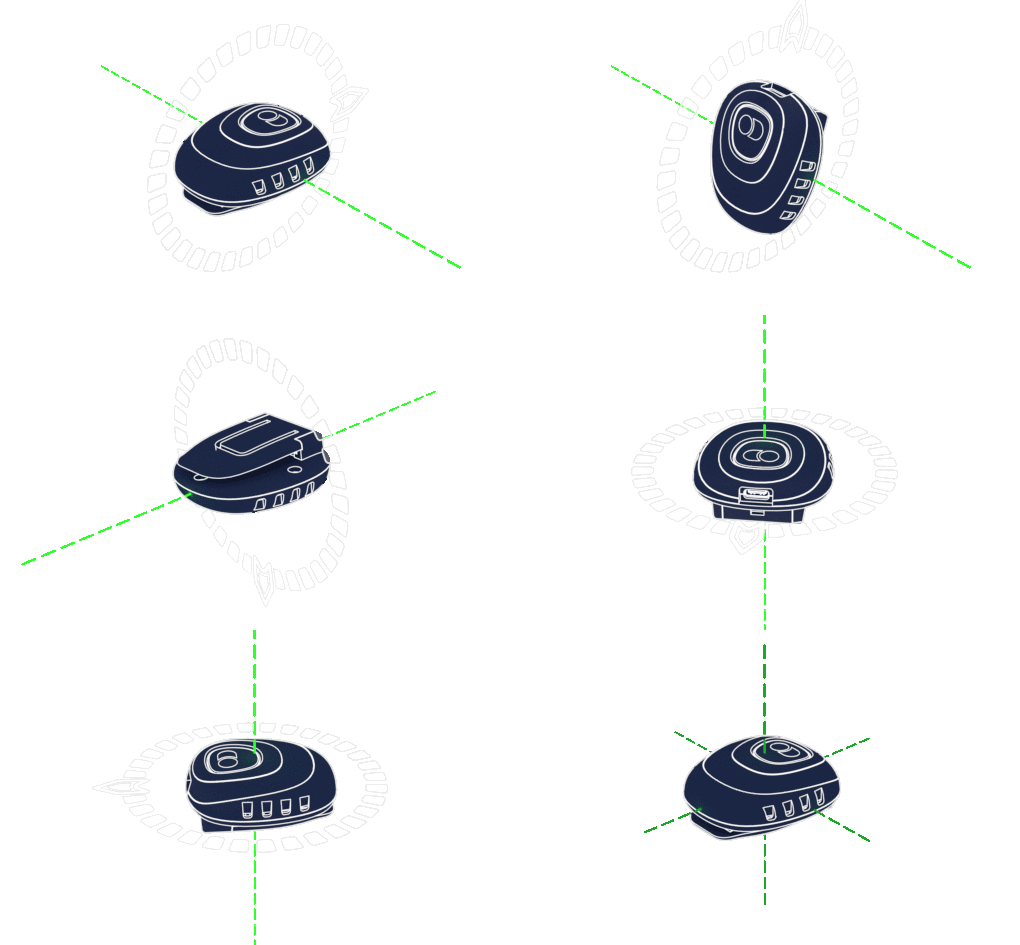
Proper calibration ensures an accurate heading for long play sessions. In essence - the unique magnetic field of the DecaMove device calibration process, effects your play area. By rotating it on its three axis allows the device to separate the surrounding magnetic field from the magnetic field of the DecaMove itself.
- Open the DecaHub app you previously downloaded and installed, click on “Devices” and click on the “DecaMove” tab
- Within device options, click on “Calibrate Magnetometer”
- Before you go ahead and click "Start", briefly watch the animation in order to see what you need to do.
- When you're ready, click “Start”.
![DecaMove Magnetometer DecaMove Magnetometer]()
- Rotate the device ~180° and back in each axis as shown in the animation above. It shouldn't take anymore than about 5 seconds.
- When finished, click on "Save" - Your DecaMove should now be configured to your play area.
Gestured / manual calibration does not require any special settings or button pressing, just stand still facing forward, arms stretched down with your controllers close together in front of you, ensuring the controllers are pointing forwards for about two seconds. You can perform this gesture anytime during a game or while you’re in SteamVR.
Note: If for any reason the LED continues blinking blue for more than 30 seconds, it means that the DecaMove device cannot find the dongle: To troubleshoot the problem, please try the following;
Try plugging the USB dongle into another USB port on your PC. If it was previously plugged into a USB 3.0 port, try a USB 2.0 port. Failing that, try to pair the dongle manually. (Note: Instructions for manual pairing are currently not available)If the SteamVR driver wasn't loaded for any reason, please restart SteamVR
4. Fitting
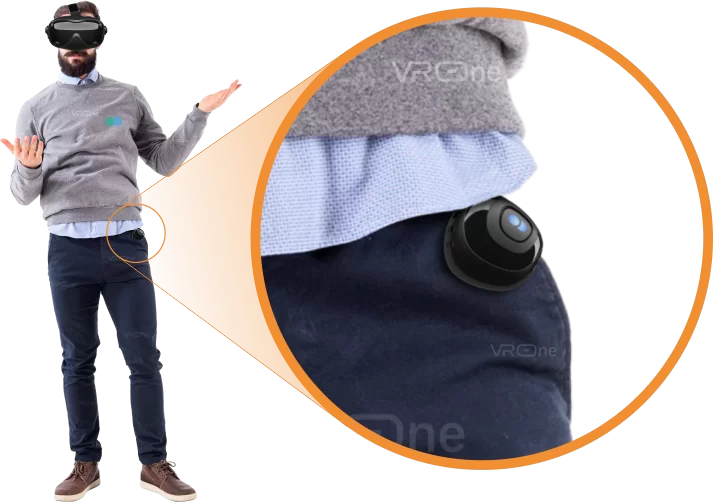
- DecaMove can be clipped anywhere along the waistline, either to the left or right side is recommended. Attach it to your belt, or the waist of your pants or skirt. Just make sure it’s firmly attached so it won’t fall off
5. Launching Games
It's recommended you launch games from the DecaHub, however, if you launch games via Steam, just make sure to select SteamVR mode - NOT Oculus VR Mode.
6. In-Game Calibration
You will need to calibrate the DecaMove at the start of every gameplay session or anytime you feel the device heading has drifted out of alignment. This is quickly achieved:
To do this, simply look forward while holding your controllers close together and pointing forwards (arms down-stretched) in front of your hips. Make sure your controllers point in the same direction as your head.
You will see the “Calibrating…” message appear - stand and hold the position until it’s complete. It only takes a few seconds.
Gameplay and Control
The DecaMove device is very efficient and accurate in doing one thing; the device allows you to navigate with your hip so your movement direction can be independent from your headset hand controllers.
Because the DecaMove system is a new concept in the way in which you move in VR, it may take a little time to get used to. It’s not something gamers are going to be accustomed to, especially if you are used to playing with controller based movement.
![DecaMove setup guide DecaMove setup guide]()
To get the best experience and immersion, it’s recommended you persevere. If you do, it won’t be long before you gain the upper-hand over your adversaries, however, if you have difficulties navigating this way, you can single press on the device button on DecaMove to toggle between the headset/controller navigation in favour of the hip based navigation.
- Double pressing the button will turn On or Off the in-game overlay
- A long press of 3 seconds will turn DecaMove On or Off
If you have any comments and would like to share them with others, please leave a
comment in the box below.




DecaMove - Setup and Quick Start Guide